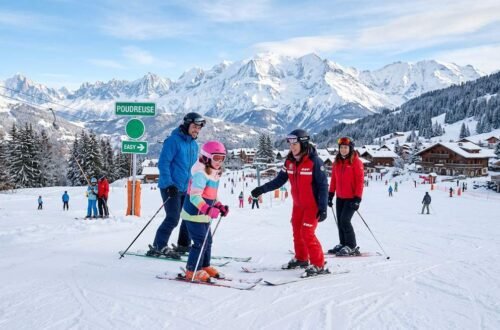
The slope tilts away beneath you, your skis start to accelerate, and suddenly the mountain feels a lot less friendly. Every skier — beginner or otherwise — knows that moment of creeping panic when speed builds faster than confidence. Knowing how to stop on skis isn’t just a technical skill; it’s the difference between enjoying a run and white-knuckling your way down it.
The National Ski Areas Association (NSAA) puts it bluntly: “always stay in control” is rule number one of the Skier Responsibility Code. Control starts with knowing how to stop.
Stopping is also more nuanced than most people expect. The right technique depends on your ability level, the terrain underfoot, and even the condition of your edges. A wedge stop that works perfectly on a gentle green run can completely fall apart on an icy blue. Fear plays a role too — panic-stopping is a real phenomenon, and understanding why your body reacts the way it does under pressure is half the battle.
What follows: the physics of what actually makes a ski stop, a step-by-step breakdown of the wedge and parallel (hockey) stop, terrain-specific strategies for steeps and ice, and emergency backup options for when your primary stop fails.
The Foundations: What Actually Makes a Ski Stop
Stopping on skis comes down to two physical forces working together: edge angle creating friction against the snow surface, and weight distribution keeping those edges engaged consistently. Understanding these mechanics — even briefly — shortens the learning curve for every technique that follows.
Edge Angle and Friction
A ski lying flat on snow is designed to glide. That’s the point — the base material is engineered for minimal friction. The moment you tilt the ski onto its metal edge, it bites into the snow surface, creating resistance that fights your forward momentum.
The steeper the edge angle, the more snow the ski displaces, and the more friction is generated. On groomed snow, even a modest edge tilt produces significant braking force. According to the Professional Ski Instructors of America (PSIA), progressive edge engagement — gradually increasing the tilt angle rather than slamming edges into the snow — gives skiers the most predictable speed control across varying conditions.
On hard-packed or icy snow, edges struggle to penetrate the surface. Sharp, well-maintained edges make a measurable difference here, which is one reason equipment condition directly affects your ability to stop safely.

Weight Distribution and Balance
Where your weight sits on the ski determines whether your edges can do their job. Balanced pressure over the balls of the feet keeps the entire edge in contact with the snow, giving you consistent grip along the ski’s length.
Leaning back — the single most common beginner error — shifts weight onto the tail. The tip lifts slightly, edge contact becomes uneven, and steering becomes unreliable. Worse, the backseat position locks the ankles and knees, removing the joint flex that lets a skier respond to changing terrain. A skier leaning back on a wedge stop will find the skis washing out sideways rather than holding a clean V-shape.
Soft, slightly bent knees aren’t just a coaching cliche. They keep the body’s centre of mass low and centred, which is the mechanical prerequisite for every stopping technique that follows.
The Wedge Stop (Pizza/Snowplough): Your First Stopping Technique
The wedge stop is the single most reliable way for beginners to stop on skis. Push your heels apart, press your inner edges into the snow, and widen the V-shape until you’re stationary. Also called the snowplough in Europe and “pizza” in most children’s ski schools, this technique works on gentle terrain at low speeds and requires no prior skiing experience to learn.
Step-by-Step Wedge Stop Technique
The mechanics are genuinely simple — four steps, no magic. But the body cues matter enormously. Rushing through them without ingraining the right posture is exactly how beginners end up picking up speed instead of losing it.
- Push your heels apart. Drive both heels outward simultaneously, letting the ski tips drift toward each other to form a V-shape. The tips should be close but never touching.
- Apply equal inward pressure to both inside edges. Roll your knees slightly inward — think of pigeon-toeing your feet — so the inside edges bite into the snow. This friction is what actually slows you down.
- Widen the wedge to increase braking force. The broader the V, the more edge surface contacts the snow, and the faster you decelerate. A narrow wedge barely slows you; a wide, aggressive wedge brings you to a controlled stop.
- Hold the position until fully stopped. Don’t release early. Keep soft, slightly bent knees, hands held forward and out (roughly level with your hips), and eyes looking downhill — not at your ski tips.
That last cue — eyes downhill — is more important than it sounds. Looking at your feet collapses your posture and shifts weight backward, which is the single fastest way to lose control of a wedge stop.
One honest observation from the slopes: most beginners who struggle with the wedge stop aren’t failing on the mechanics. They’re panicking. When speed builds unexpectedly, the instinct is to freeze or lean back. Consciously pushing the heels outward feels counterintuitive under pressure, which is why practising on the flattest possible terrain first — before any real gradient — builds the muscle memory that overrides panic later. The PSIA recommends beginners spend their first 20-30 minutes on near-flat terrain specifically for this reason.
Common Wedge Stop Mistakes to Avoid
Three errors account for the vast majority of failed wedge stops. Recognising them early saves a lot of frustrating (and occasionally painful) repetition.
| Mistake | What Causes It | How to Fix It |
|---|---|---|
| Ski tips crossing | Pushing toes inward rather than heels outward; tension in the legs | Focus the push from the heel, not the toe — think “heels apart, tips stay close but free” |
| Leaning back onto heels | Fear response to speed; trying to “sit” into a stop | Press shins into the front of the ski boots; weight should be over the balls of your feet |
| Too narrow a wedge | Lack of hip flexibility or insufficient heel pressure | Actively drive heels wider; exaggerate the V until stopping becomes reliable, then refine |
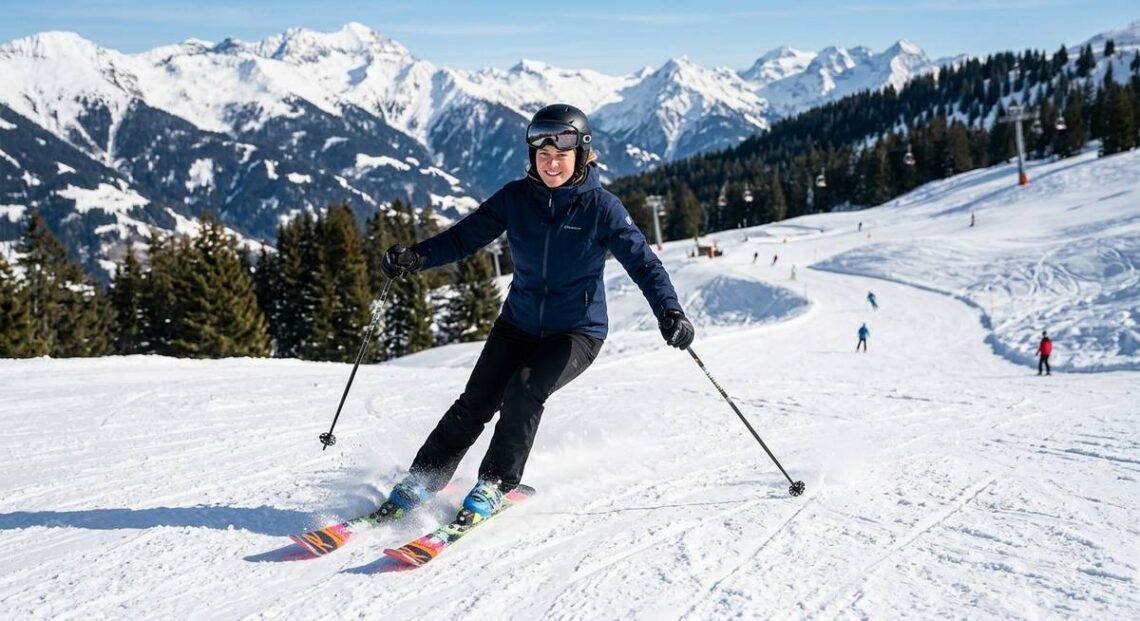
The Parallel Stop (Hockey Stop): Levelling Up Your Stopping Power
The parallel stop — or hockey stop — is the technique that separates recreational skiers from confident ones. Both skis stay hip-width apart, both edges engage simultaneously, and the result is a sharp, controlled halt that works at real speed on blue, red, and black runs. Once you own this skill, the wedge becomes a tool you choose rather than a crutch you rely on.
When to Progress from Wedge to Parallel
Three readiness signals, and all three need to be true: you can wedge-stop reliably on blue runs, you can link basic turns without the wedge collapsing, and speed no longer triggers a panic response. Missing even one? You’re not ready yet. Rushing this progression is one of the most common causes of intermediate falls, because the parallel stop punishes hesitation. A half-hearted attempt provides almost no braking at all.
Confidence matters as much as technique here. Skiers who attempt the hockey stop while anxious tend to bail out mid-movement, leaving skis flat and momentum unchecked. If speed still feels threatening, spend another session on controlled wedge turns first. The parallel stop rewards decisiveness.
Step-by-Step Parallel Stop Technique
- Build a little speed on a gentle slope. You need enough momentum for the edges to actually grip and skid — attempting this from near-standstill teaches nothing useful.
- Keep skis hip-width apart and parallel. Resist any urge to push into a wedge. Feet stay level, roughly shoulder-width, throughout the entire movement.
- Initiate a turn across the fall line. Use your upper body to face slightly downhill while your lower body begins rotating the skis sideways — think of your hips and shoulders as a stable platform your legs pivot beneath.
- Simultaneously roll both knees uphill to engage the edges. Both knees tip toward the slope together, digging the uphill edges into the snow. Skiers who focus on this single cue often nail the stop within a few attempts.
- Push both heels downhill to skid and scrub speed. The skis pivot across the slope, the edges bite, and momentum bleeds away quickly. Hold the edge angle until fully stopped.
The “knees into the hill” cue works because it forces simultaneous edge engagement rather than one ski leading the other. When edges engage unevenly, the skis wash out in different directions. Symmetry is everything.
Wedge Stop vs. Parallel Stop Comparison
| Factor | Wedge Stop | Parallel Stop |
|---|---|---|
| Best terrain | Green and easy blue runs | Blue, red, and black runs |
| Effective speed range | Low to moderate | Moderate to high |
| Skill level required | Beginner | Intermediate |
| Stopping distance | Longer, gradual deceleration | Shorter, rapid deceleration |
| Energy cost | Low — sustainable over many runs | Moderate — leg fatigue on repeated use |
| Ice performance | Poor — edges lack grip at low angles | Better — sharper edge angle bites harder |
Stopping on Different Terrain and Snow Conditions
The same parallel stop that works perfectly on a groomed blue run can fail on an icy black or a mogul field. Terrain and snow surface change the physics of stopping, and adapting to those variables is what separates a confident skier from someone gripping their poles and hoping for the best.
Steep Runs
On steeper gradients, speed builds faster than most skiers expect, which means the window to initiate a stop is shorter. Attempting an abrupt halt on a steep pitch is one of the most common causes of falls — the forces involved simply overwhelm edge grip.
The smarter approach is to bleed speed progressively through a series of linked turns across the fall line before committing to a full stop. Each traversing turn scrubs momentum in manageable increments. When you do stop, commit to a more aggressive edge angle — roll your knees harder into the hill than you would on a gentle slope, and initiate the movement earlier than feels necessary.
Icy or Hard-Packed Snow
Ice is the worst-case scenario for stopping: edges struggle to bite because there’s minimal surface texture for them to grip. Sharp edges make a measurable difference here — a ski with dull edges on hard-pack behaves almost like a flat ski on ice. According to the International Ski Instructors Association (ISIA), skiers should have edges tuned to 88-89 degrees for typical resort skiing, with sharper angles for consistently icy conditions.
On icy terrain, widen your stance slightly for a broader base of support and apply edge pressure gradually rather than abruptly. Sudden, aggressive edging on ice causes the ski to skitter sideways rather than grip. Slowing down through multiple shallow turns is far more reliable than attempting one decisive stop.
Groomed Pistes, Powder, and Moguls
| Condition | Key Challenge | Stopping Adjustment |
|---|---|---|
| Groomed piste | Fast, predictable surface | Standard parallel or wedge stop works reliably |
| Powder | Snow resistance slows you naturally but skis can sink and catch | Keep weight centred-to-forward; avoid hard edging that buries tips |
| Moguls | Uneven terrain disrupts balance mid-stop | Use the back side of a mogul as a natural brake; absorb bumps with soft knees |
| Icy/hard-pack | Minimal edge grip | Sharp edges, gradual pressure, multiple turns to shed speed |
Powder actually assists stopping in one important way — the snow itself provides resistance that groomed runs don’t. The trap is leaning back, which causes ski tips to rise and the tails to sink, making directional control nearly impossible. Stay centred, and powder’s natural drag does much of the work for you.
When Your Stop Fails: Emergency Backup Techniques
Sometimes a stop just doesn’t work. Ice, unexpected speed, tired legs, pure panic — all of these can override even solid technique. Having a backup plan prevents a missed stop from becoming a trip to ski patrol. None of these options look cool. All of them work.
The Controlled Fall
Deliberately sitting down feels like admitting defeat. It isn’t — it’s a legitimate last resort that even experienced instructors endorse. The PSIA teaches the controlled fall as a specific skill: lower your centre of gravity, sit to one side (not straight back), and let friction with the snow slow you naturally. Aim your body uphill and away from obstacles.
The critical detail: never put your hands down behind you to catch yourself. That’s how wrists break. Keep your hands and poles up and in front of your chest. Your hip and thigh absorb the impact far more safely than outstretched arms.
Steering into Soft Snow or Terrain Features
If a controlled fall isn’t ideal — say you’re on a narrow, crowded trail — aim for the nearest patch of soft snow or the uphill side of the slope. Deep snow at piste edges acts as a natural brake, and even a slight uphill trajectory converts your speed into elevation, slowing you naturally through gravity.
Mogul backs work similarly. The uphill face of any bump provides natural deceleration. Ski instructors often teach this as “terrain braking” — using the mountain’s geometry to do what your edges can’t.
What Not to Do
Grabbing a pole and trying to dig it into the snow as an anchor is a common instinct and a reliably bad idea. Poles aren’t strong enough to stop a body in motion and the asymmetric force frequently causes shoulder injuries. Similarly, aiming directly at another skier, a lift tower, or fencing to “use them to stop” puts everyone at risk. When a stop fails, fall safely or steer away from people and obstacles. Those are the only two good options.
Frequently Asked Questions
What is the easiest way to stop on skis?
The wedge stop (also called the snowplough or pizza stop) is the easiest technique — push your heels apart to form a V-shape while pressing the inside edges into the snow. It requires no prior skiing ability and works well on gentle green and blue terrain at low speeds. Most ski schools teach this within the first 30 minutes of a beginner lesson.
How long does it take to learn to stop on skis?
Most beginners can perform a basic wedge stop within one to two hours of instruction on gentle terrain. The parallel (hockey) stop typically takes several days of consistent skiing to develop, as it requires confidence with speed and basic turning ability first. Individual timelines vary based on athletic background and comfort level on snow.
Why can’t I stop on skis?
The most common reasons are leaning too far back (which lifts the ski tips and removes edge contact), a wedge that’s too narrow to generate sufficient braking force, or panic causing the body to freeze. Pressing your shins into the front of your boots and consciously widening your wedge usually corrects the problem. If your edges are dull, equipment maintenance may also be a factor.
What is the difference between a pizza stop and a hockey stop?
A pizza stop (wedge) angles the skis into a V-shape and uses the inside edges for gradual braking — best for beginners on gentle slopes. A hockey stop keeps skis parallel while skidding both edges sideways across the snow for rapid deceleration — suited to intermediate and advanced skiers on steeper terrain. The hockey stop is faster but requires more skill and confidence.
How do you stop on skis on icy terrain?
Sharp, freshly tuned edges are essential — dull edges on ice offer almost no grip. Apply edge pressure gradually rather than abruptly, widen your stance for stability, and bleed speed through multiple shallow turns instead of one aggressive stop. If edges still won’t bite, steer toward softer snow at the piste edge or use the uphill side of the slope to let gravity slow you.
How do you stop on skis when going fast?
At higher speeds, the parallel (hockey) stop is the most effective technique — turn your skis perpendicular to the fall line while engaging both uphill edges simultaneously. Avoid attempting a wedge stop at speed, as the forces involved can push your skis apart uncontrollably. If a clean stop isn’t possible, bleed speed through a series of wide, arcing turns before committing to a final halt.
Should I take a ski lesson to learn how to stop?
A professional lesson is the fastest and safest way to learn. Certified instructors (look for PSIA certification in North America or BASI in the UK) can diagnose posture and technique issues in real time that written guides simply can’t address. Even a single one-hour group lesson typically covers the wedge stop, basic turning, and slope safety — enough to ski beginner terrain with confidence.
Building Confidence One Stop at a Time
Stopping on skis is the foundation everything else builds on — turning, speed control, navigating terrain, and eventually skiing with genuine freedom. Start with the wedge on gentle terrain, move to the parallel stop when you’re linking turns comfortably, and learn to read snow conditions so you can adapt your technique on the fly.
And if your stop ever fails completely? Sit down. It’s not graceful, but it’s effective and safe. Every skier — including the ones flying past you on black runs — has done it at some point. The mountain isn’t going anywhere. Take your time, build the muscle memory, and the confidence follows.