Tape the spots that blistered on you before. Done the night before you start walking, that one habit prevents more hiking blisters than any sock, powder or boot upgrade you can buy.
Almost every guide treats blisters as something you respond to. You walk, something stings, you sit on a log and stick a patch over it. By that point the tear under your skin has been forming for hours, and your fix has to work on a foot that is swollen, damp and sore. The prevention that works is dull, costs about two dollars, and happens before day one.
It also has a randomized trial supporting it, which is more than can be said for most of the sock aisle.
What causes blisters when hiking
Blisters form when the layers under your skin surface are stretched sideways, over and over, by the bones shifting inside your foot at every step. Heat and damp do not create that stretch. They lower the load your skin can take before it tears.
This is where the leading results contradict each other, and the disagreement changes what you should pack.
REI’s guide, built on the NOLS Wilderness Medicine curriculum, lists three culprits: pressure, friction and moisture. Rebecca Rushton, an Australian podiatrist of 30 years who provides foot care at six-day ultramarathons, argues that rubbing is rarely the problem at all. Her framing is shear, the sideways give in skin that gets loaded thousands of times a day. Fluid fills the torn space within about two hours and you have a blister.
Take the shear view seriously and your shopping list changes. Powders and slick creams reduce surface rubbing, so they help a little and then wear off. Materials that soak up the sideways movement before it reaches your skin do more: tape bonded flat to the skin, a gel cap over a toe, a low-friction patch stuck inside the shoe. That is why a hiker who has tried talc, liner socks and a wider boot with no luck often gets a clean trip from one strip of tape.
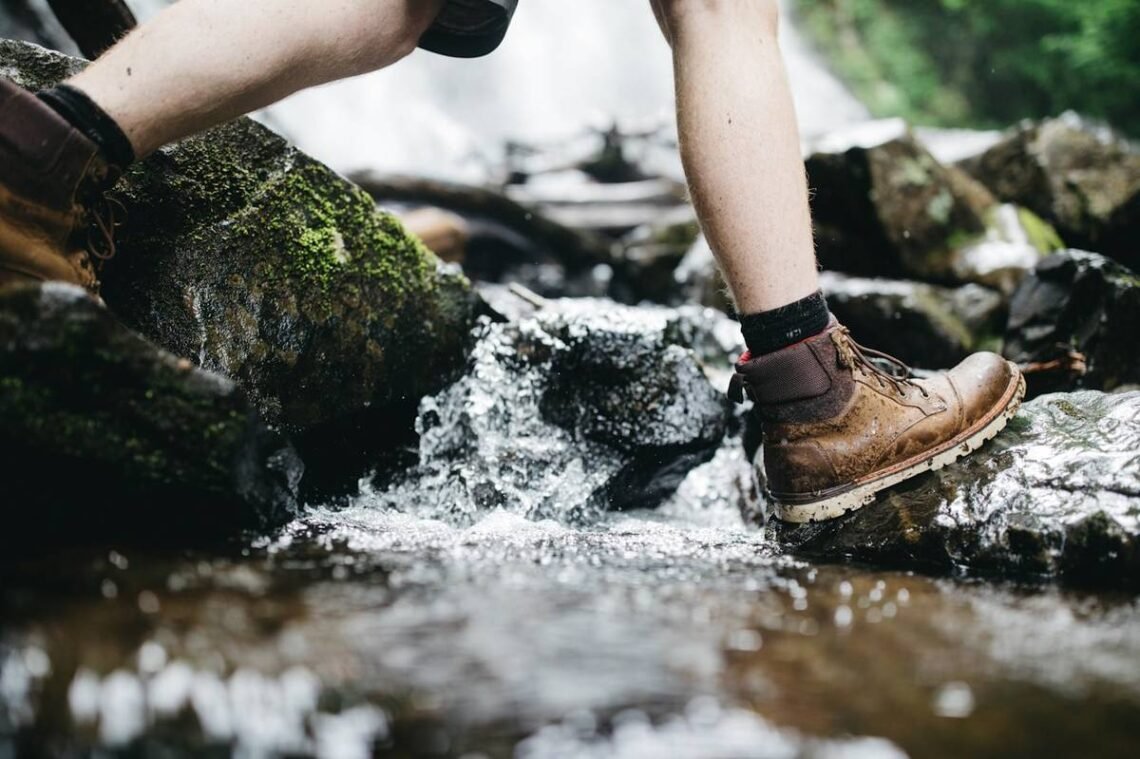
Moisture still earns its place on the list. Wet skin is soft skin. Peel a sock off after an hour of stream crossings and the pale, wrinkled surface underneath tears at loads that dry skin shrugs at, which is why a day of rain wrecks feet that were fine all week.
Your blister history is the prevention plan
The blister you had last time is the blister you will get next time. In a 2023 survey of 533 French trail ultramarathon runners published in the Journal of Sports Medicine and Physical Fitness, a history of blisters raised the odds of a new one roughly sixteenfold, far outweighing any prevention product the runners reported using.
That number turns a piece of folk wisdom into the strongest predictor anyone has measured. Your feet keep a record. Read it.
Sit under a lamp the night before you leave and build the map:
- Name every spot that has blistered on you in the last two years. Left heel, right pinky toe, under the ball of the left foot. Be specific enough to point at.
- Add every callus. Rushton’s point here is useful: calluses and blisters come from the same repeated shear, one adapted slowly and one did not. A callus marks a spot your skin is defending, so expect it to fail when your daily mileage triples.
- Add the toes and the heel by default, because that is where the injuries cluster.
- Tape all of it before you drive to the trailhead.
- Photograph the finished tape job. Next trip you copy it in three quiet moments and skip rediscovering the layout on a cold morning.
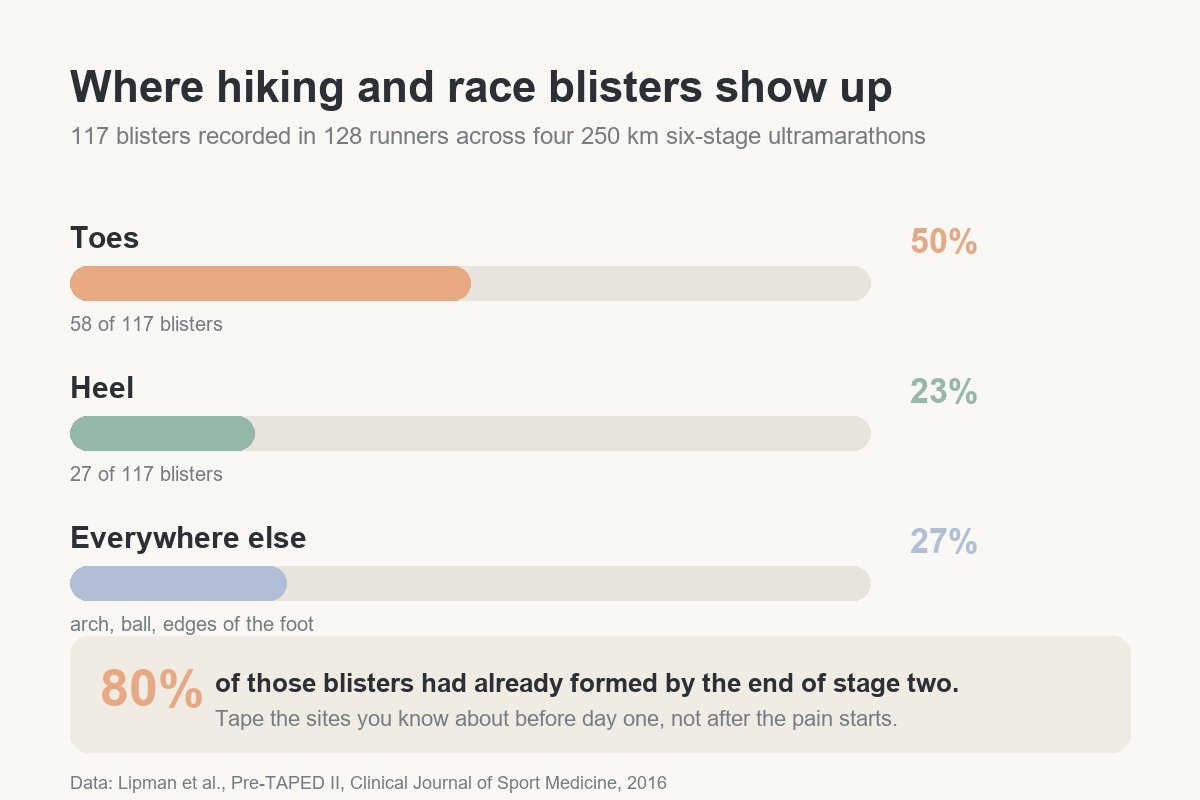
Hikers underestimate the timing. Eighty percent of the blisters in that study had formed by the end of the second stage, and Rushton reports the same pattern from multi-day hiking research: day two is the ambush. Get your known trouble spots through the opening days protected and the rest of the trip tends to go quietly.
How to prevent blisters while hiking with paper tape
Cheap paper surgical tape, applied to blister-prone skin before you set off, cut new blisters by about 40% in a randomized trial of 128 ultramarathon runners. It is the only prevention method here with that level of support.
The study design deserves a look, because it is unusually clean. Grant Lipman’s team at Stanford enrolled runners at the 2014 RacingThePlanet 250 km six-stage races in Jordan, the Gobi, Madagascar and the Atacama. One foot per runner was taped over its blister-prone areas before the race; untaped skin on that same foot served as the control, so each participant was their own comparison. Result: a 40% reduction in blisters, with a number needed to treat of 1.31. Roughly speaking, tape three runners and you spare two of them a blister.
Now the uncomfortable half. A systematic review in Wilderness & Environmental Medicine screened 806 papers and kept 11 controlled trials covering socks, antiperspirants and barrier products. Its verdict on that pile was blunt: a paucity of high-quality evidence for any of them. Paper tape was the one intervention the reviewers gave moderate confidence to.
That does not make merino socks useless. It means the confidence gap between “this brand prevents blisters” and “this was tested” is much wider than the marketing suggests, and the tested option costs less than a sandwich.
Applying it takes about a minute per site:
- Use tear-to-size paper surgical tape, the kind sold as Micropore in any pharmacy for a few dollars a roll. Thru-hikers who want something tougher reach for Leukotape, which sticks for days and survives rain better.
- Skin must be clean and dry. Wipe with an alcohol pad, let it flash off, then apply.
- Lay the strip flat with no wrinkles and no tension. A ridge in the tape becomes the new pressure point.
- Round the corners with scissors so edges do not lift inside a damp sock.
- Leave it on. Good tape rides several days, and pulling it off nightly to inspect skin defeats the purpose.
Two boundaries. Those runners were racing in dry desert stages with light packs, not carrying 40 pounds through a wet week on the Appalachian Trail, and waterlogging is the failure mode nobody in the trial faced. And if adhesive irritates your skin, tape is the wrong tool for you. Hydrocolloid plasters or a friction patch stuck to the inside of the shoe do a similar job on the shear and never touch your foot.
Fit, lacing and socks: the parts tape cannot fix
Tape protects the sites you can name. Your footwear system decides how many new sites appear. Do the arithmetic on a normal walking stride of about two and a half feet and a mile works out to roughly 2,100 steps, so a ten-mile day gives a small error in fit more than 20,000 chances to compound into an injury.
Both directions of bad fit blister you, which is why the advice sounds contradictory. Boots too tight cram the toes and pinch the sides. Boots too loose let the heel lift and slide the same patch of skin thousands of times. What you are looking for sits between them: firm enough that your heel stays put on a descent, roomy enough that your toes spread when the ground tilts.
One popular sizing rule deserves a second look. You will read everywhere that feet swell up to half a shoe size on trail, often citing a research paper. Follow that citation and it lands on a case study of one 49-year-old ultratriathlete who completed ten Ironman races in ten consecutive days, whose foot volume tracked his fluid intake and his climbing creatinine levels. It is an interesting finding about kidney function under extreme load. It is not a measurement of what your feet do on a weekend backpacking trip. Leave thumb room in front of your toes because descents slam them forward, not because a paper you have never read told you to size up.
Lacing does more than its reputation suggests, and it is free:
“For me I’ve found that my foot moving around within the shoe on downhills is what leads to my issues. I originally blamed the shoes because it was worse on some shoes than others, but it was really my discovery of heel-lock lacing that helped with everything.”
– r/trailrunning, March 2026 (5 upvotes)
Heel-lock lacing, sometimes called the surgeon’s knot or lace lock, uses your top two eyelets to anchor the ankle so the heel stops lifting. It takes one extra loop on each side and it is the highest-return adjustment on this list for anyone who blisters on descents. Long downhills are also where trekking poles pay off, since braking with your arms stops your toes from ramming the front of the boot on every step.
Socks, liners and toe socks
Cotton is the one clear rule: it soaks up water, loses shape and stays wet. Merino or synthetic, fitted snugly with no folds, cut tall enough that the cuff clears the top of your boot collar. A sock bunched under the arch is a pressure point you built yourself.
Beyond that the experienced voices split, and you should know they do. Owen at Darn Tough, who has thru-hiked the Appalachian Trail and the Continental Divide Trail, finds liner socks unnecessary with a modern fitted sock and thinks toe socks add irritating bulk between the toes. Camino walkers and trail runners in the same threads swear by Injinji toe liners under a wool sock. Both camps have thousands of miles supporting them. One commenter put the situation better than any label: “Dare I say, there isn’t a one size fits all!”
Test whichever combination you choose on a long day before the trip, together with the exact boots and the exact pack weight you plan to carry. That test walk belongs in the final fortnight of any plan to train for hiking, and it is also when you find out your sock height is wrong. For the wider question of what goes on the rest of you, our guide to what to wear when hiking covers the layering and footwear system in one place.
Lubricants, debris and toenails
Petroleum jelly is the most argued-about item in this category, and the trial evidence for it is thin. Hikers keep using it anyway:
“This is the cheapest and most effective method. We just rubbed petroleum jelly whenever blisters tended to form and never got them again.”
– r/CaminoDeSantiago, November 2025 (10 upvotes)
The practical catch is that it disperses into your sock within a couple of hours, so it demands reapplication on a long day. Ultrarunners use a heavier petroleum-based balm before they know their feet will be soaked, on the theory that it slows the skin from waterlogging.
Two mechanical items close out the list. Grit inside a shoe grinds one spot all day, so low gaiters over the collar and a shoe-emptying stop at lunch are cheap insurance. And trim your toenails square and short, because a nail long enough to touch the shoe on a descent produces a blister underneath the nail, which is as unpleasant as it sounds.
The hot spot rule
Stop at the earliest hint of warmth, before it becomes a sting, because the window where a hot spot can still be talked out of becoming a blister is short and closes fast.
Rushton’s warning is that the hot spot stage is subtle and does not last long: by the time you feel a definite sting, the tear has started and you are managing a blister rather than preventing one. REI’s guidance built on the NOLS curriculum says the same thing in plainer words, which is to stop the moment a spot feels uncomfortable.
Boots off, sock off, look. If the skin is even faintly pink, dry it, cover it with tape or a blister pad, and put the sock back on. A four-minute stop on the trail is the difference between finishing the week and hobbling out on day three.
Questions hikers ask about preventing blisters
These come up in every thread about how to prevent hiking blisters, along with the one everybody asks after the damage is done. Short answers first, with the reasoning underneath each.
What do hikers use to prevent blisters?
Paper surgical tape or Leukotape on known trouble spots, merino or synthetic socks that clear the boot collar, and boots fitted with room for swelling. Experienced hikers add gel toe caps for pinch blisters and friction patches inside the shoe. Tape is the option with trial evidence supporting it.
Should I put Vaseline on my feet before a hike?
It helps some hikers and does little for others, and controlled trials have not shown a clear benefit. Petroleum jelly reduces surface friction but disperses into your sock in about two hours, so reapply at every break. It also softens skin, which works against you on a wet multi-day trip.
Why do I keep getting blisters when hiking?
Because the same spot takes the same sideways load trip after trip, and a past blister predicts the next one better than any other factor yet measured. Repeat blisters point at fit, heel movement or a callus that marks chronic shear. Treat that specific site before you walk, ahead of any flare.
How do you prevent blisters from hiking day after day?
Protect your known blister sites before day one and guard them hard through days two and three, when most blisters appear. Carry a second pair of dry socks, air your feet at lunch, and re-tape any lifting edges each evening before the skin under them gets rubbed.
How do you keep hiking with a blister?
Pad around it, not over it: a doughnut-shaped piece of Molefoam takes the pressure off the roof while you walk. Leave an intact blister undrained where you can, because the fluid protects the raw skin below it. Change into dry socks and dry the wet pair on your pack. If it has torn open, clean it, cover it with a hydrocolloid plaster, and watch for redness, pus or streaking that means you should get medical care.
Does this work for heel blisters from boots on long road walks?
Yes, and the Camino is where the method gets its hardest test. Flat road walking loads the heel and the ball of the foot for hours with no terrain variation, so hikers who never blister in the mountains blister on pavement. Tape the heel before you set out, lace with a heel lock, and swap to dry socks at the midday stop.
A roll of paper tape costs about two dollars and lasts several trips. Put it on those two or three spots you can name from memory, the night before you leave, and you will get through day two with your feet intact.